
Sector 4 Offroad Innovations
Don't Call Us! (xxx) xxx-xxxx
MADE IN THE USA!
MENU:
Install Instructions and Tips for our Linkage Twin Sticks
While the overall installation of our twin sticks isn't overly complicated, we figured giving you a guide should help with most questions. Any other questions about install can be directed via email to Matt or via phone (732) 567-9228
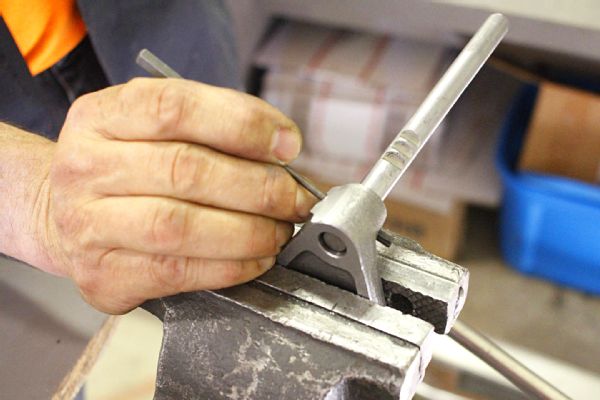
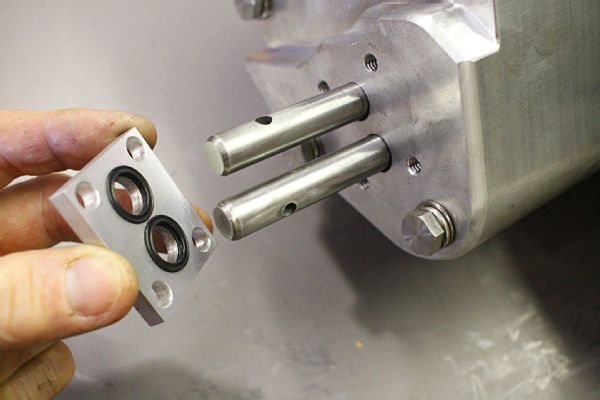
We will skip a few steps to begin. First the transfer case must be drained, removed, etc. And split apart. Don't forget to remove your speedo sleeve first! The first parts to replace in your case will be the shift shafts. We supply new shift shafts with the kit, and they are designed to be used with our billet output only. Knock the roll pins out of the shift forks, and save them. You'll reuse these roll pins to install the new shift shafts. Keep the detents in the shafts in the same orientation as the old shafts.
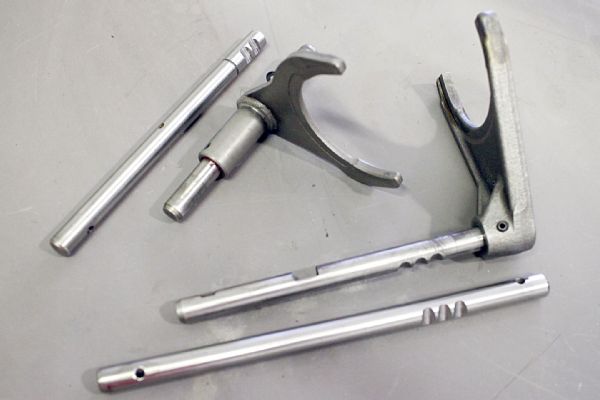
This is a picture of both shift shafts and forks. The old (original) shift shafts are still in the forks, and the new ones (longer) are sitting next to them. Shorter shaft with the e-clip groove is used in the 2/4 shift fork, while the longer shaft is used in the hi/lo shift fork. Keep them oriented properly or you will not have any detent action! You will need to reuse your original e-clip from your 2/4 shift shaft, and clip it onto the new S4 2/4 shaft. This can be done after assembly in the fork. Center the roll pins as best you can when assembling.
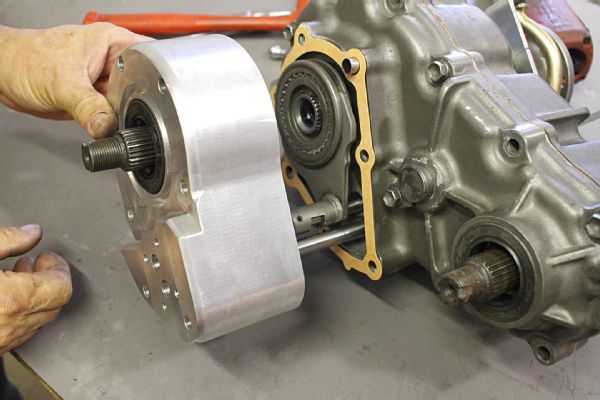
Your billet output housing will come with a new bearing already installed. Remove the original snap ring from your factory output, and install it in the groove right above the bearing, just like the stock setup. Then, you can support the INNER RACE of the bearing, and press or hammer (brass hammer) your front output shaft into the front output bearing. After this is done, you should be able to install the new billet output housing. Obviously, your shift shafts need to be reinstalled along with gears, etc. before this step. To simplify matters and cut out time, we aren't showing a stock case rebuild, but can answer any questions you have about it. The output housing will slide on, and we recommend either black or copper RTV. We have had more than a few paper gaskets fail. After everything is set up, you can begin to set up the links and sticks.
Don't forget to reinstall the detents! 2/4 shift shaft needs the detent installed BEFORE assembling case or installing the 2/4 shift shaft. The hi/lo detent can be installed after the case is assembled.
Seals need to be installed in the front seal plate, then the seal plate and seals need to be carefully installed over the shift shafts. Once you push it all the way to the output housing, you can install the 4 allen head bolts to secure the seal plate. This step must be done BEFORE installing the front links.
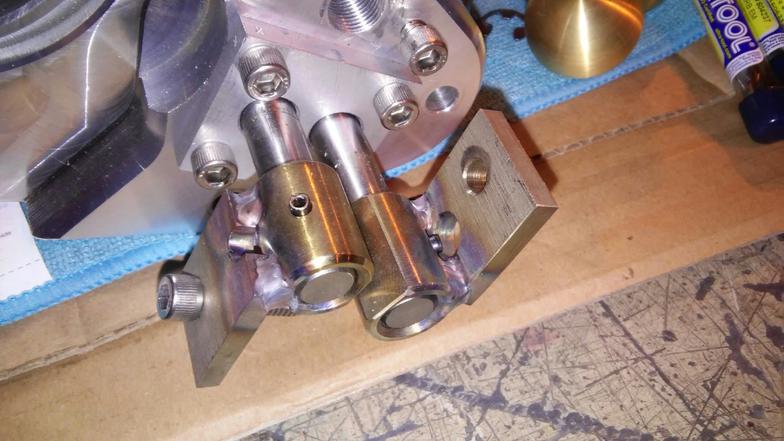
Now the front links can be installed. Each one of these has a roll pin driven through them. The link with a hole drilled thru it will need to be installed upright on the hi/lo side. The other link will need to be installed upside down on the 2/4 shift shaft. Both of these uses a supplied bolt and nut, to secure the bolt to the tab.
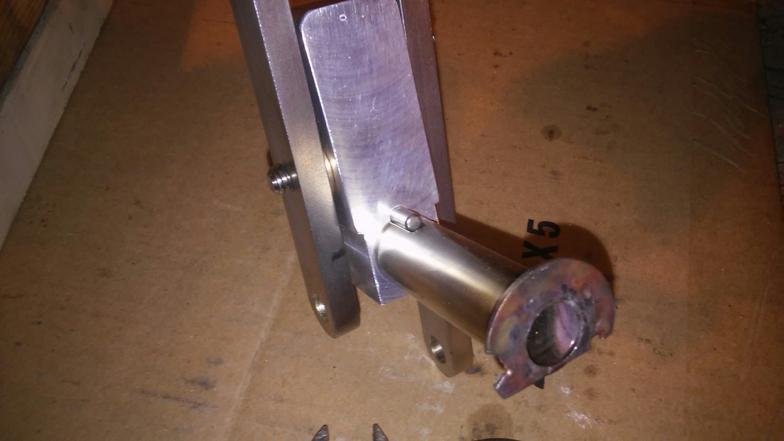
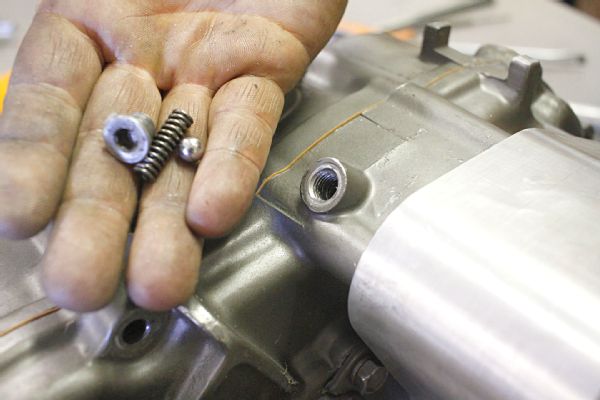
The shift "tower" which contains both sticks, is shipped assembled. There is a small pin installed, to prevent the shaft from turning on you. There is also a groove cut into the washer that mounts to the face of the output housing. Theres a small bolt there, intended to "pinch" the washer wherever you set it. If you feel the need to move the assembly and the washer is limiting movement, the small notch on the washer can be ground out further to provide the necessary clearance to move the assembly.
Shifter assembly will be hung thru the hole in your floor, and placed on the front of the output housing, locating the small notch in the washer with the pinch bolt on the face of the housing.
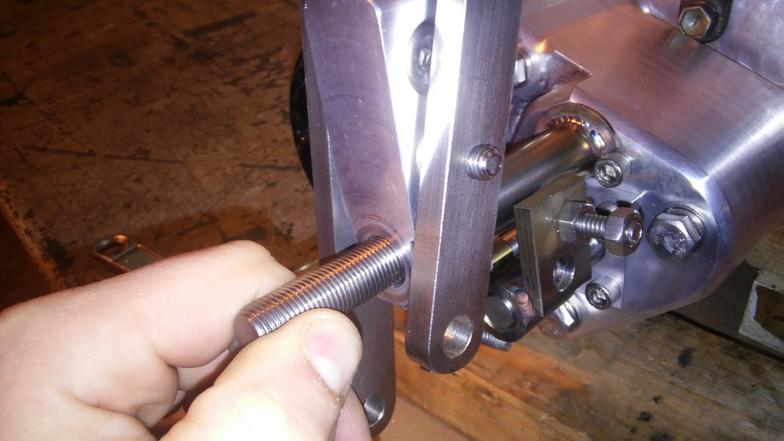
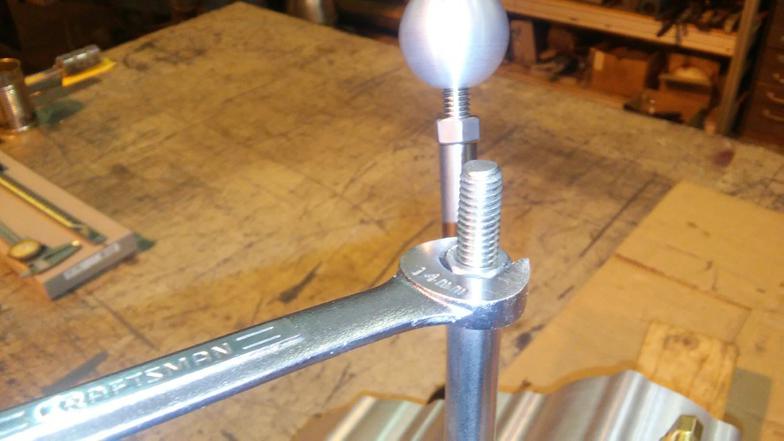
The shifter assembly is held in place while the stainless stud is ran into the output housing. Run this stud in until it stops, it may require some wiggling of the shifter assembly to assure it is seated.
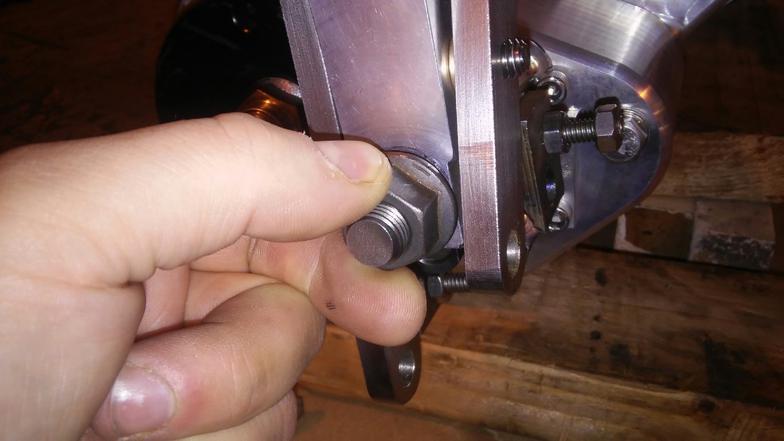
Once the stud is seated, you can run the locking nut on. We send a plain steel flanged nut for setup (easier to remove), and a coated Nyloc nut with a stainless washer, for final assembly. The Nyloc tends to grab the stud and will walk the stud out with the nut when you remove it, so we recommend using the flanged nut for setup purposes, then swap over to the Nyloc nut when you are doing your final installation.

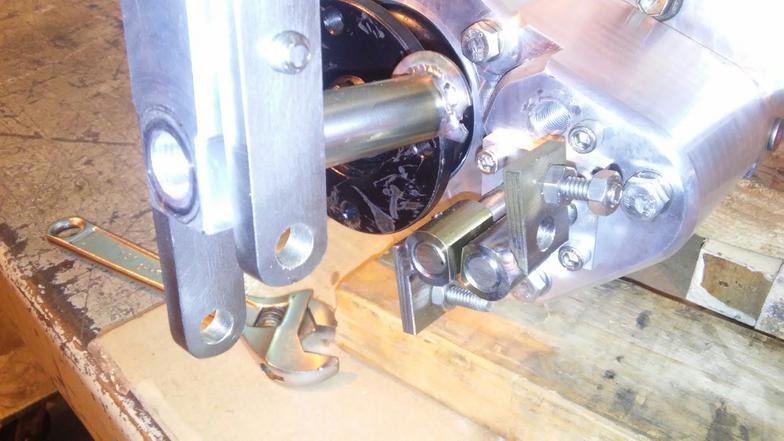
Here you can see the bolt and nut tightened onto the front link, and the stainless spherical rod end and brass link both being fitted at the same time. These will slide over, and you will tighten another nut on the rod end, and install a stainless clip on the brass end. There is adjustment in this setup, so it is a good idea to set your stick travel BEFORE doing all of your final tightening, etc.
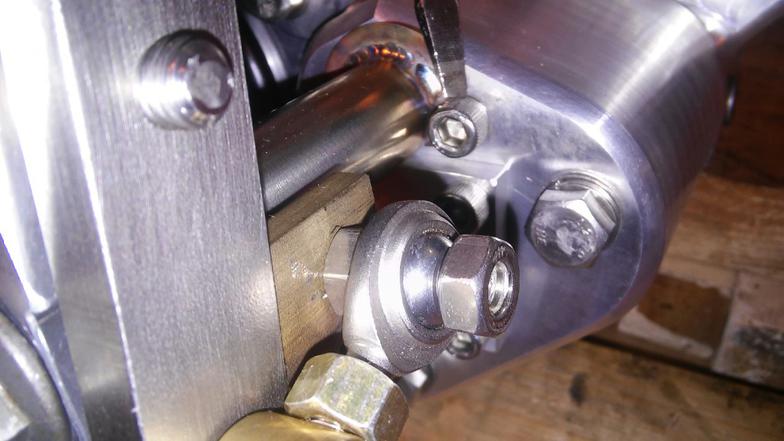
Spherical Rod End installed.
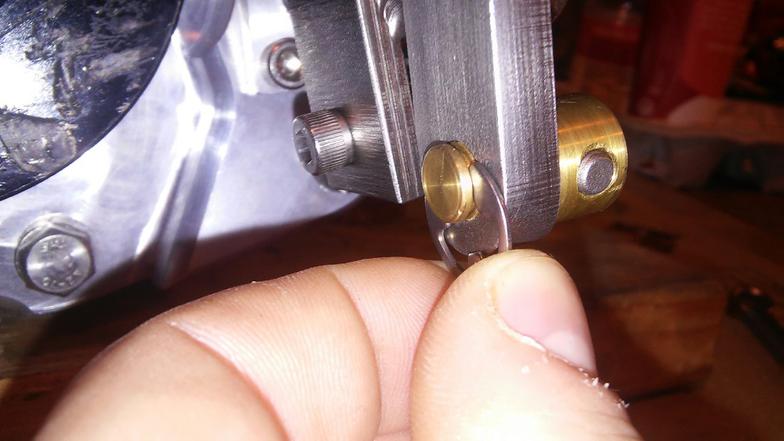
Stainless clip installed on brass link.
Install your shift knob studs to the top of the sticks, run down the lock nuts and tighten. Then just screw the shift knobs on.

This is your finished setup. Links need to be installed on the correct side, so as not to make contact with the driveshafts. Sticks will need to be adjusted (most of the time) to get them centered and in the position you need them. The 2/4 stick does not have much movement, its a very short throw. The hi/lo stick on the other hand, requires some adjustment to assure the throw doesn't interfere with the factory hole in the floor. You will have a new front seal supplied, that you will need to install before you fit your flange to the front of the case. Another tip- when you tighten down your lock nut for the shifter assembly (small allen headed locknut that clamps to the grooved washer), shift your hi/lo stick back. This will pull the shift shaft out, and allow you to sneak an allen key in there to tighten it.
